
5 Last Minute Easter Activities for Kids (free downloads!)
Something I've been slowly learning (the hard way) is that kids are easy to please. They find joy in the most simple things! So it's often unnecessary to bend over backward to spend all night baking a birthday cake from scratch when they're perfectly happy with a store-bought one. Kids don't care if they have a fancy pool or buckets of water in the backyard, they just have fun. They never notice if something is "Pinterest worthy" or not, and I know my kids are much happier when I don't try to make it so. So this Easter week, I decided to try and come up with some festive activities that we could do on a whim. Nothing fancy. No planning. No extra trips to the store.
And guess what?! They still had fun.
So I hope you try out these ideas and enjoy them as much as we did! And we have two free downloads for you to enjoy as well! Happy Easter!

Toilet Paper Roll Bunnies
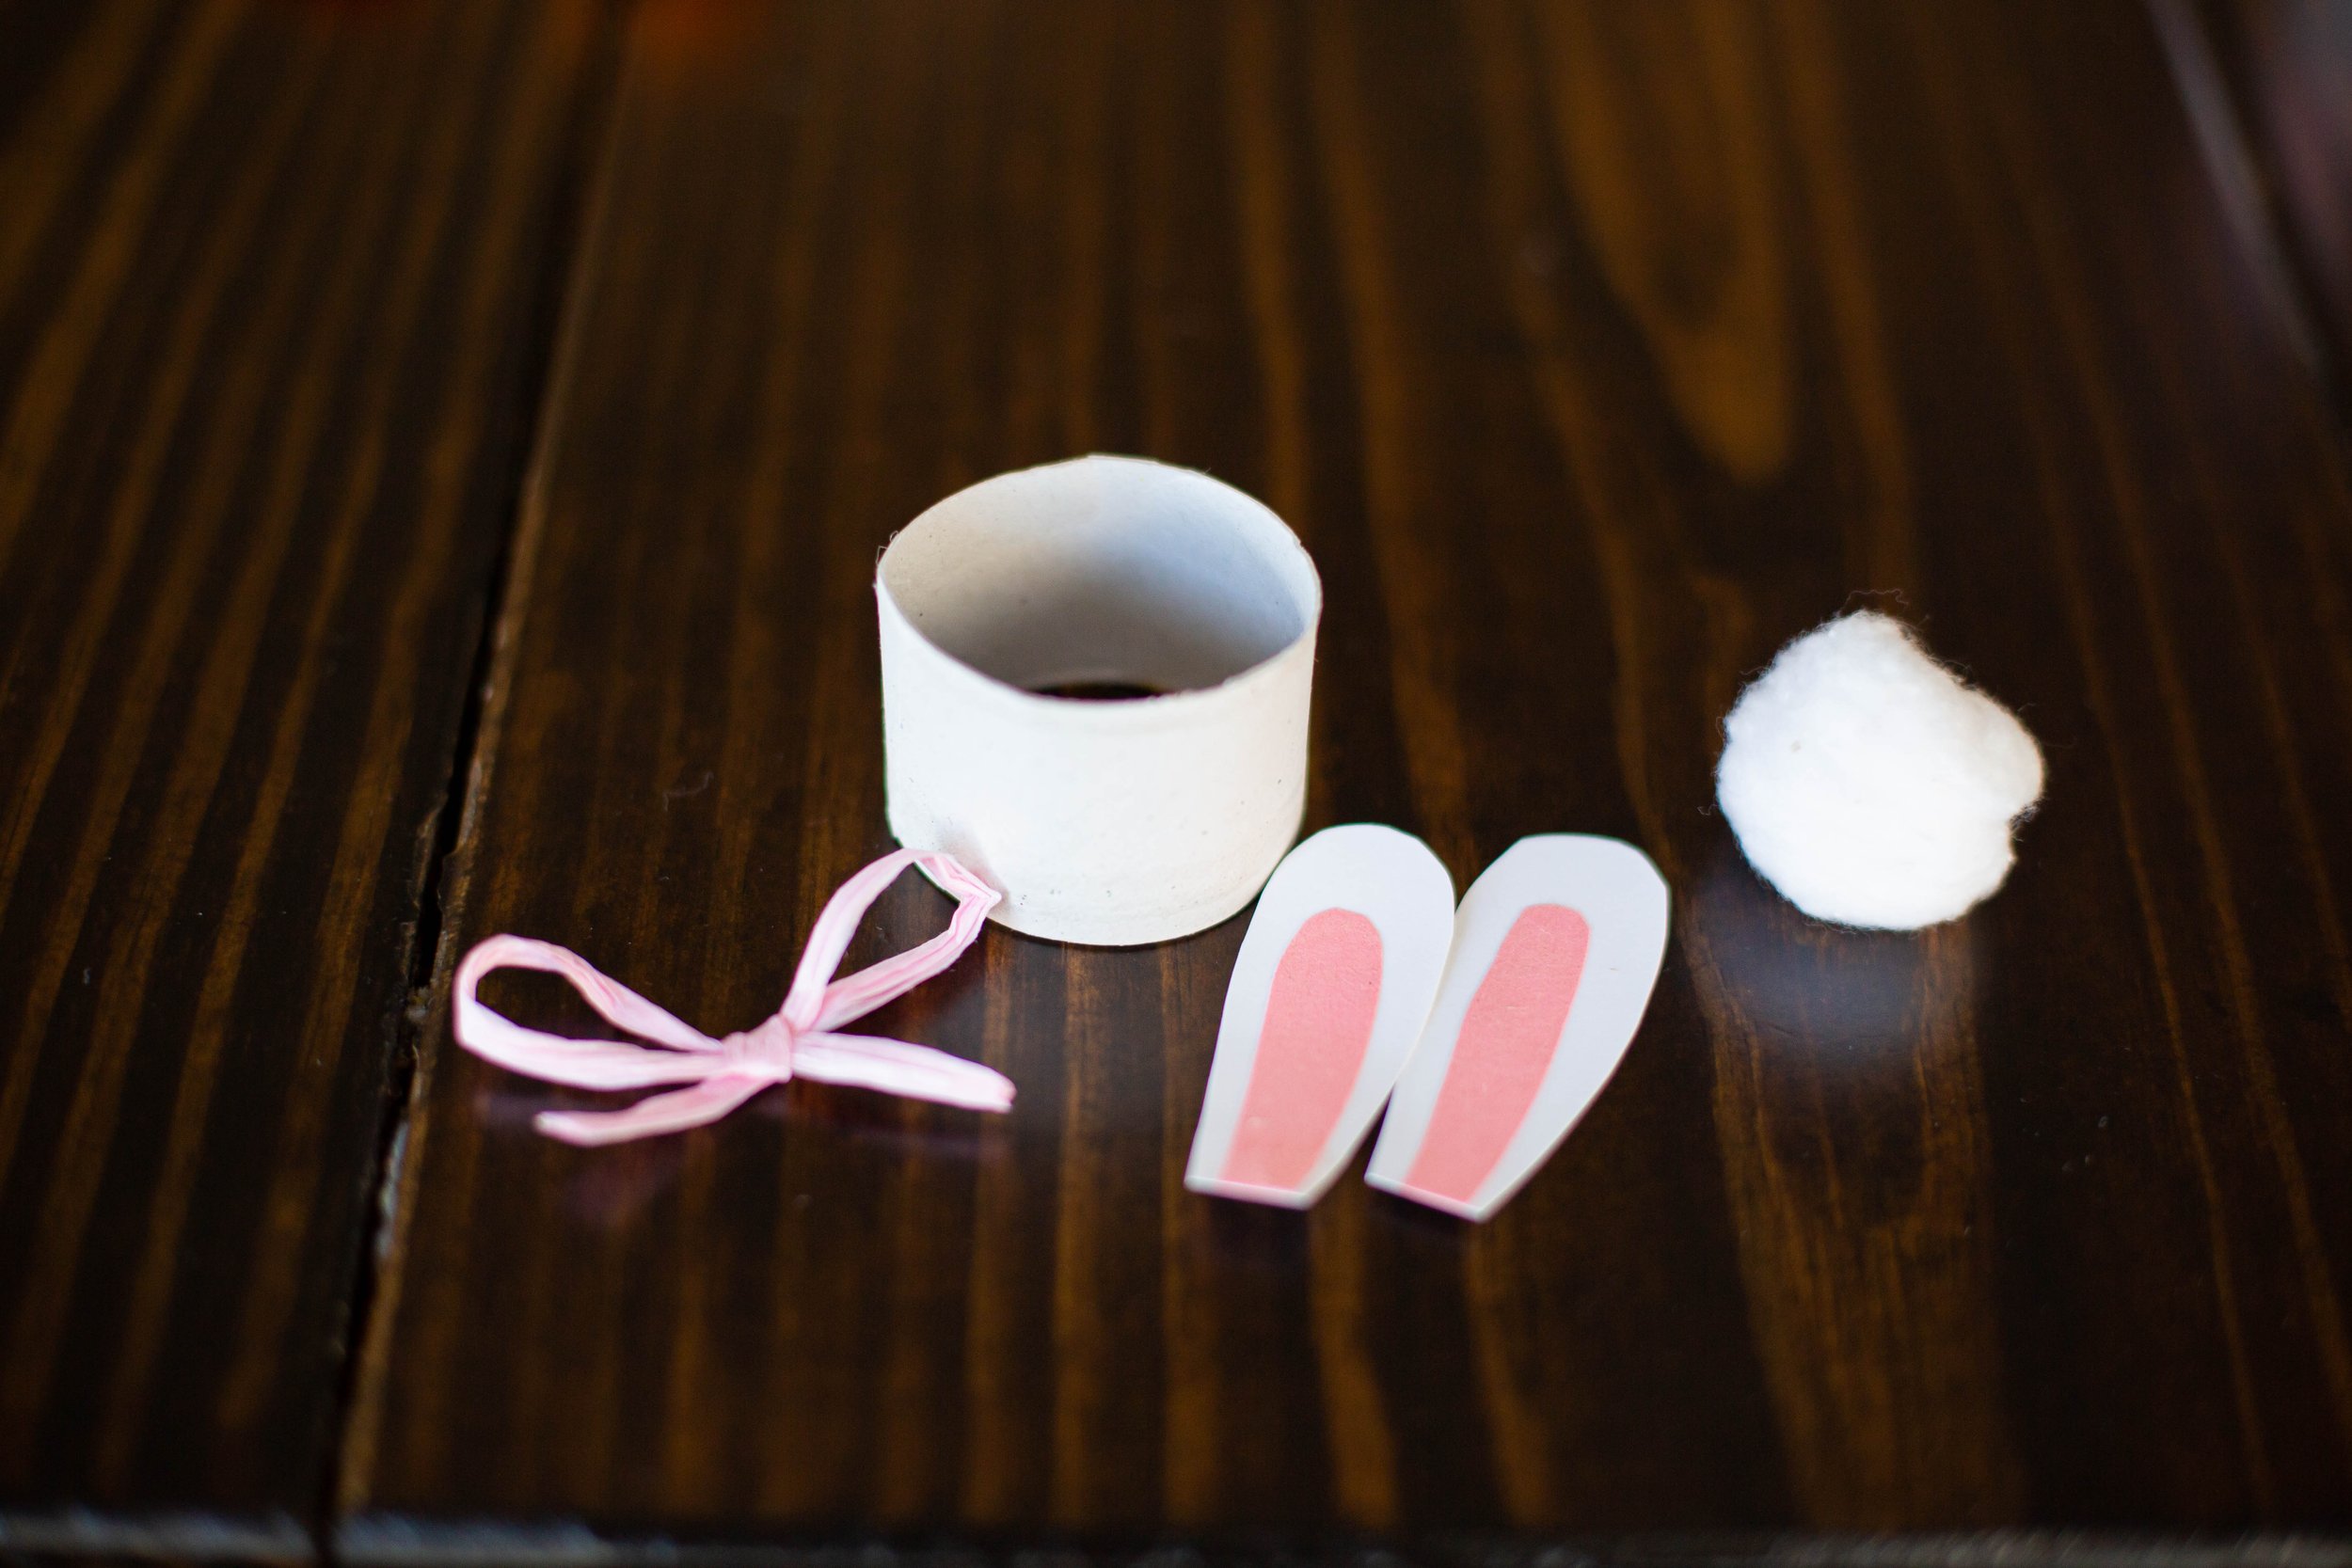
This is a great one if you save toilet paper rolls for crafts! These little bunnies are super cute, you'll likely have all the materials on hand and your kiddos will absolutely adore making their own unique bunny!
You will need:
Toilet paper rolls
White paper
Pink paper
Ribbon
Cotton balls
Glue
Scissors
Instructions:
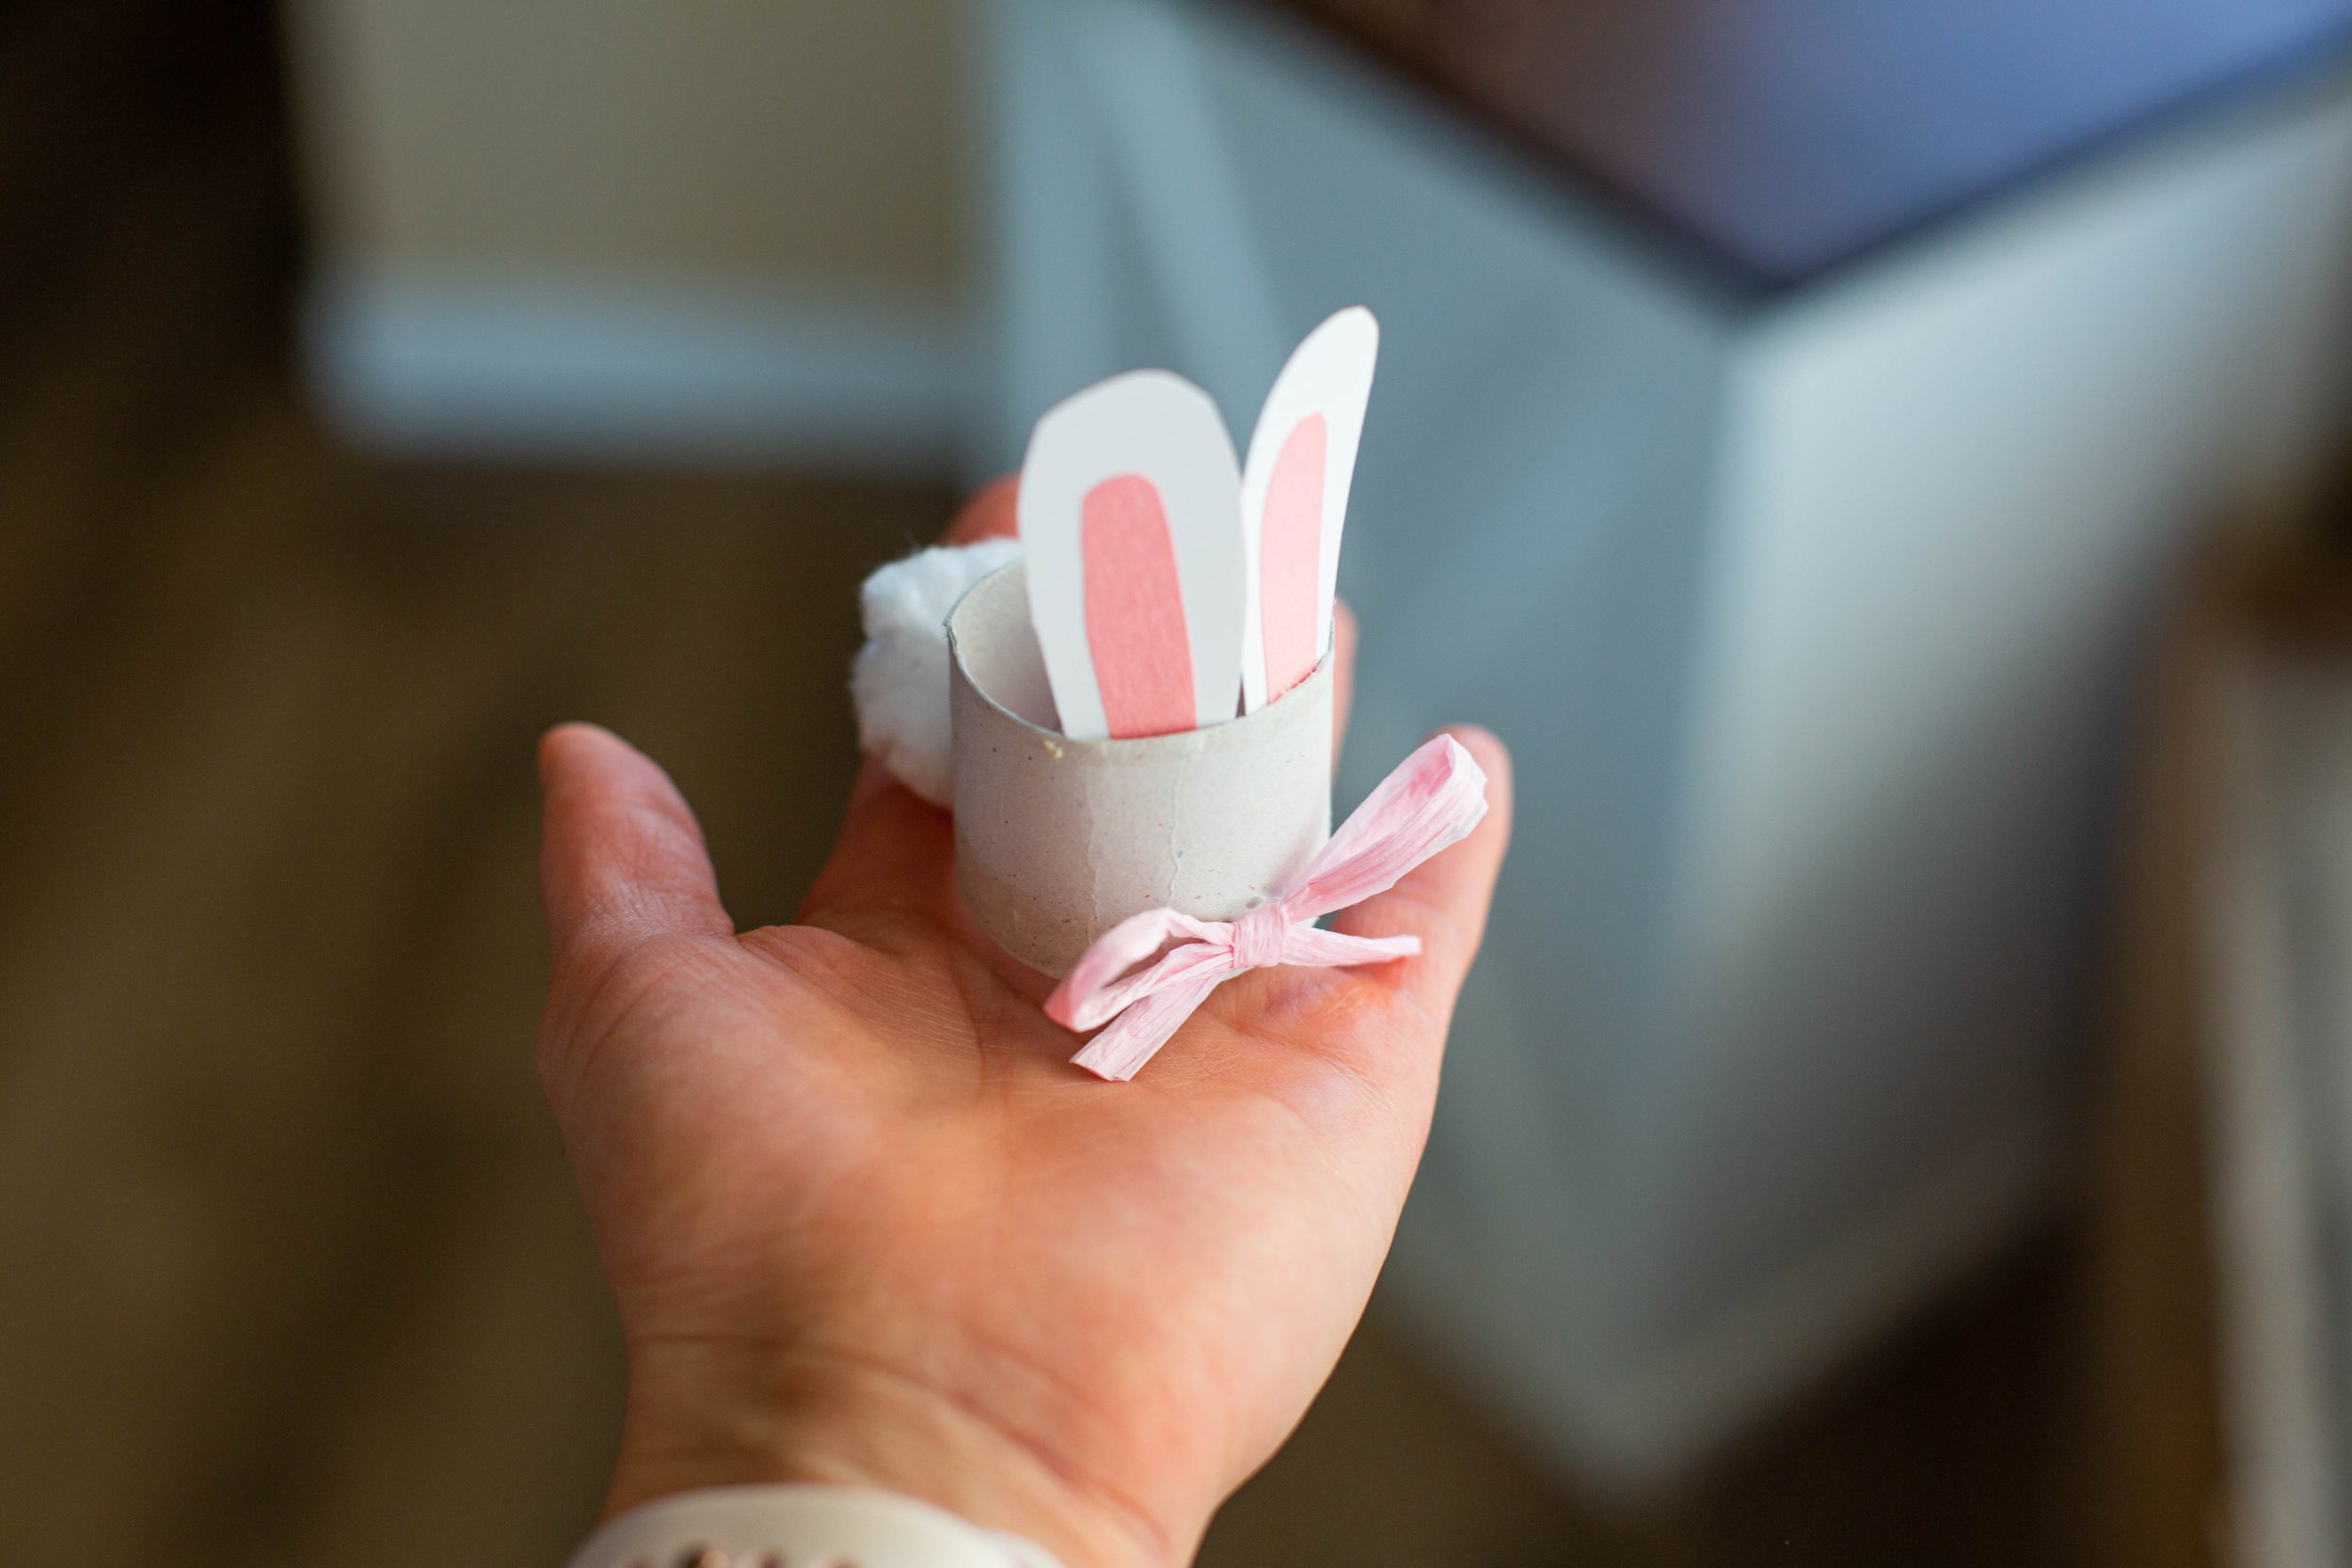
Cut each toilet paper roll in half.
Cut out or draw a bunny ear on a white sheet of paper. Use that ear as a pattern to trace the other bunny ears needed. Do the same with the pink sheet of paper except make smaller ovals to create the inner part of the ears.
Glue the pink pieces to the white to create the ears.
Cut a string of ribbon and then tie it into a bow for the bunny's bowtie.
Now that all of your pieces are ready, have your child assemble the bunny with glue; ears at the top, cotton ball in the back for the tail, and the bowtie right in front. If they'd like, they can draw a face on the bunny as well! I also had one girl put the bow at the top of the head making it a girly hair bow, but the creating is all up to them!
Activity Notes:
My kids are a little younger, so it was easier for me to put together the ears and bowtie before they got their hands on it. However, if you feel your child is capable of doing the other steps or can help you with this, that's wonderful!
Glitter Eggs
Here's another simple craft that only takes a few steps to create. Plus it's sure to dazzle those little ones!
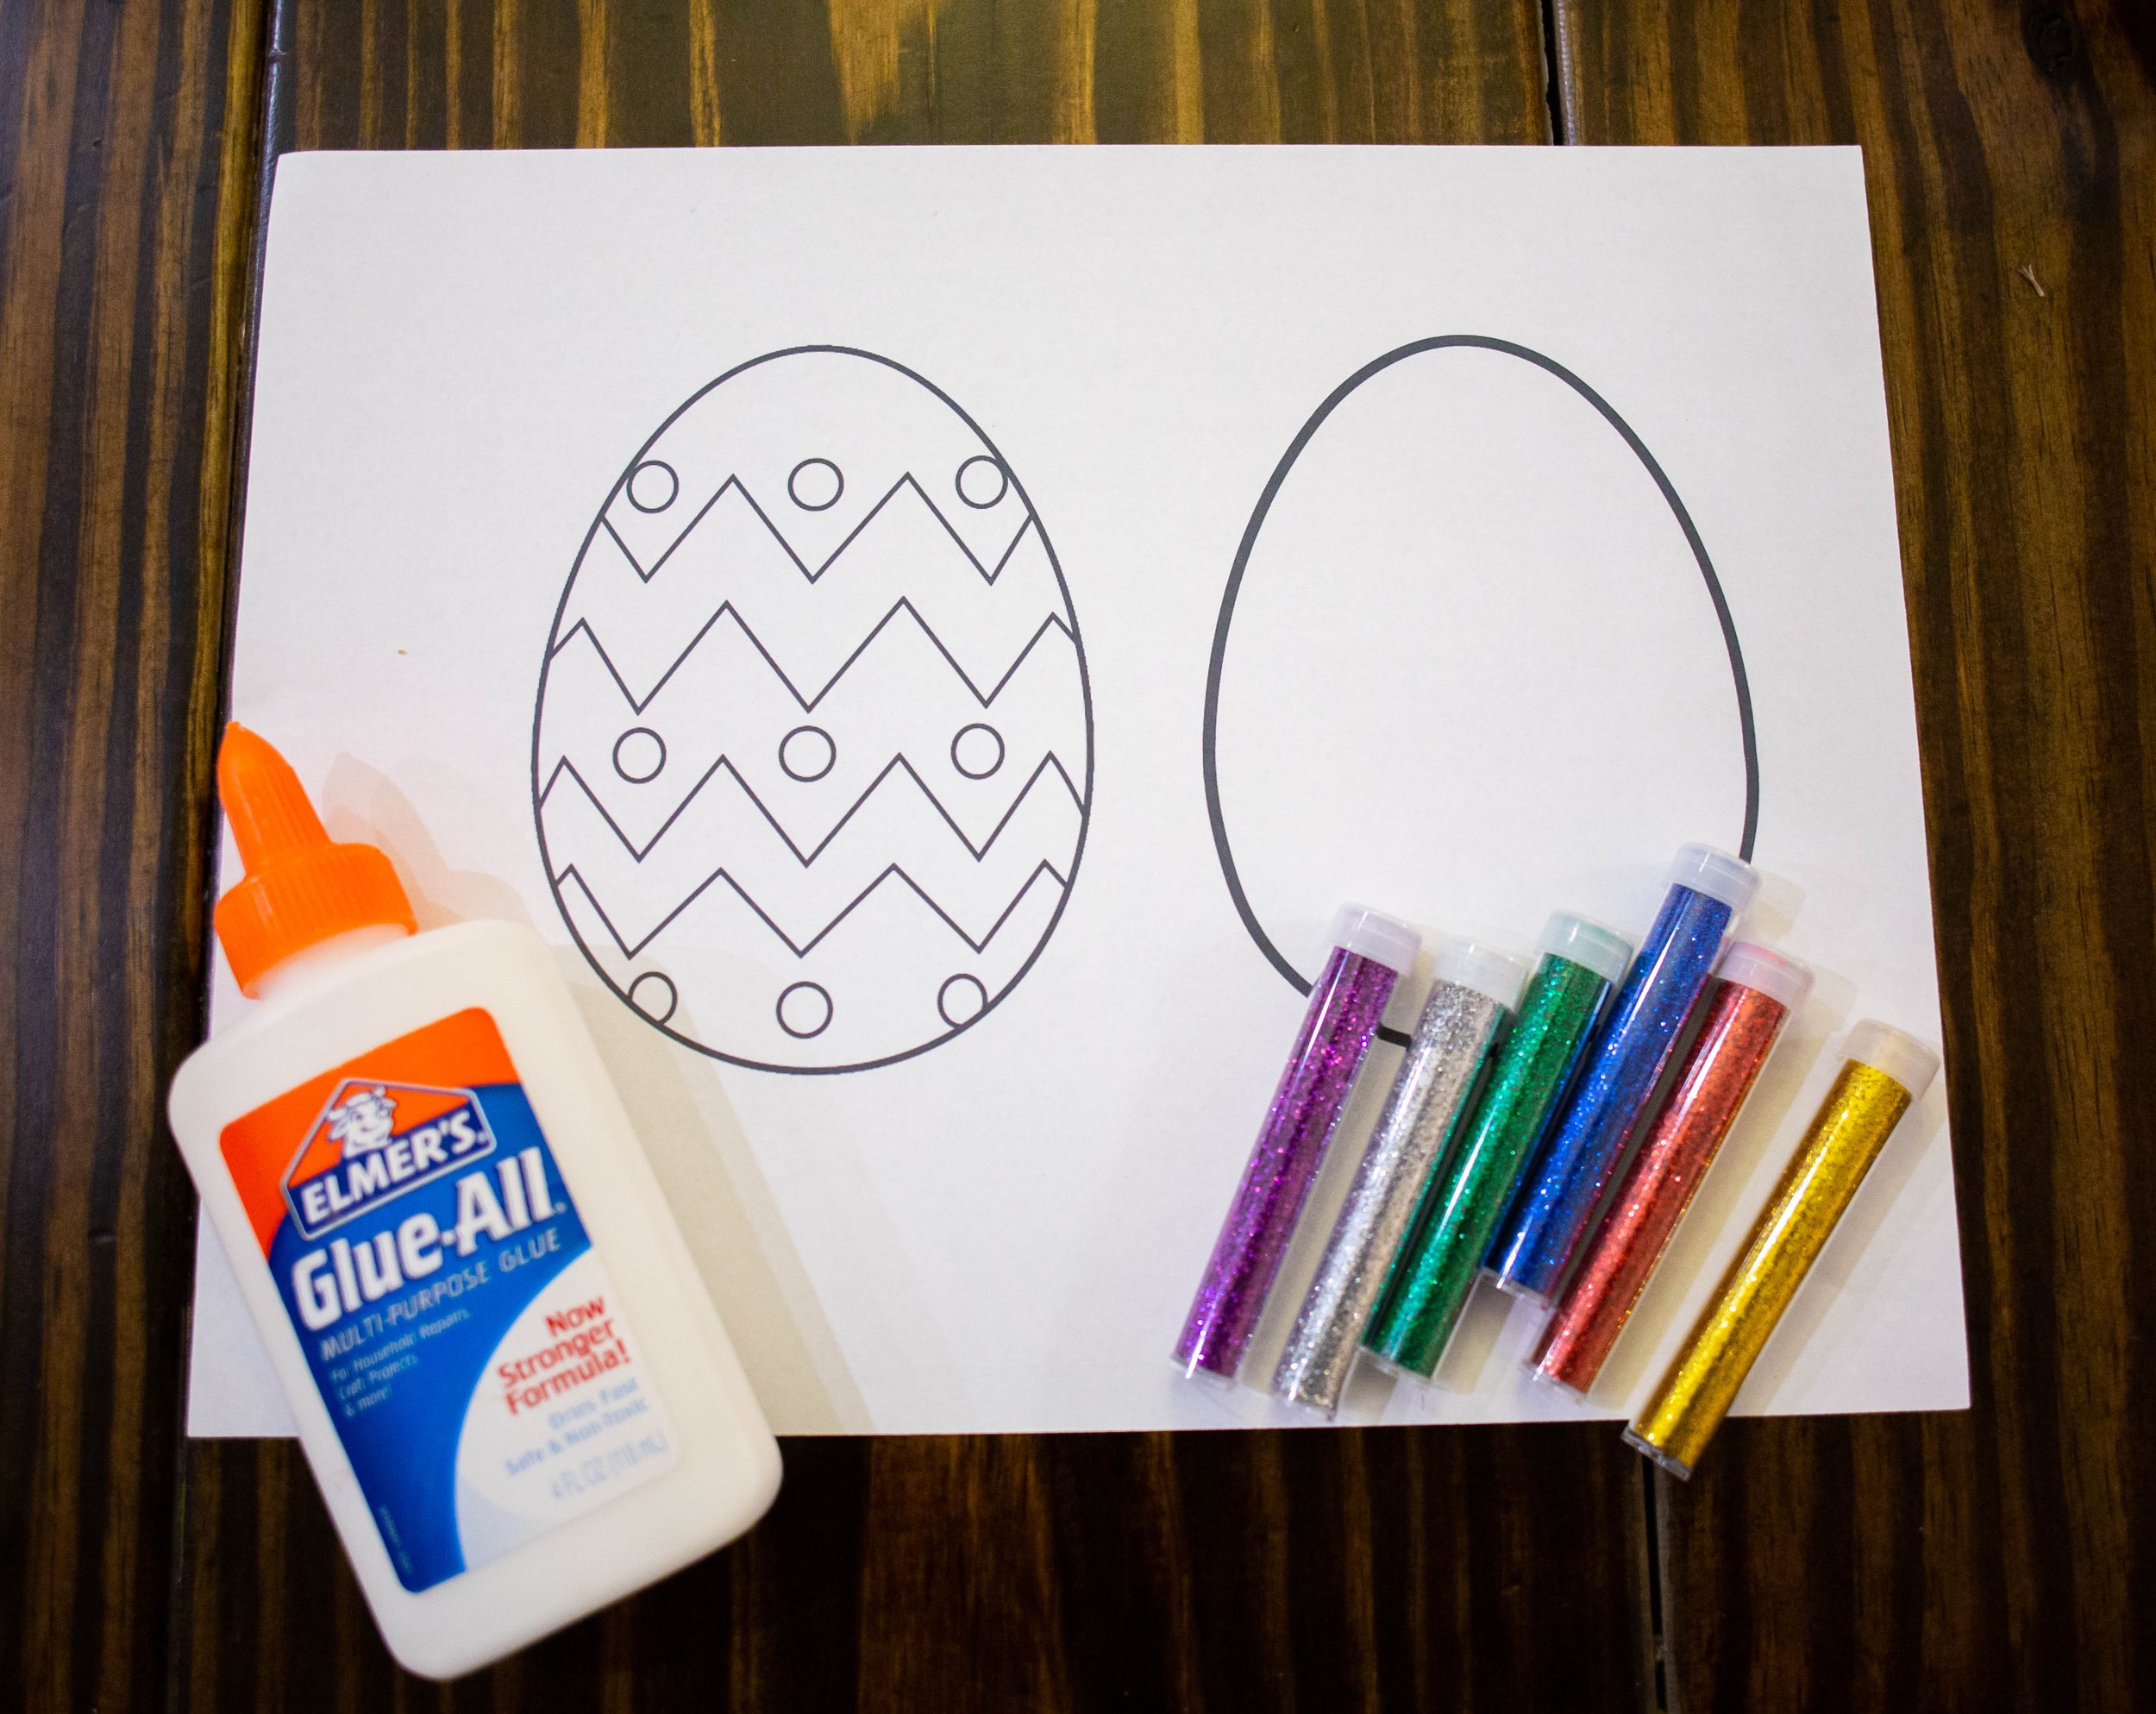
You will need:
Easter egg outline printout (download below)
Elmer's Glue
Glitter
Cookie sheet (optional)
Instructions:
Print out the Easter egg outlines.
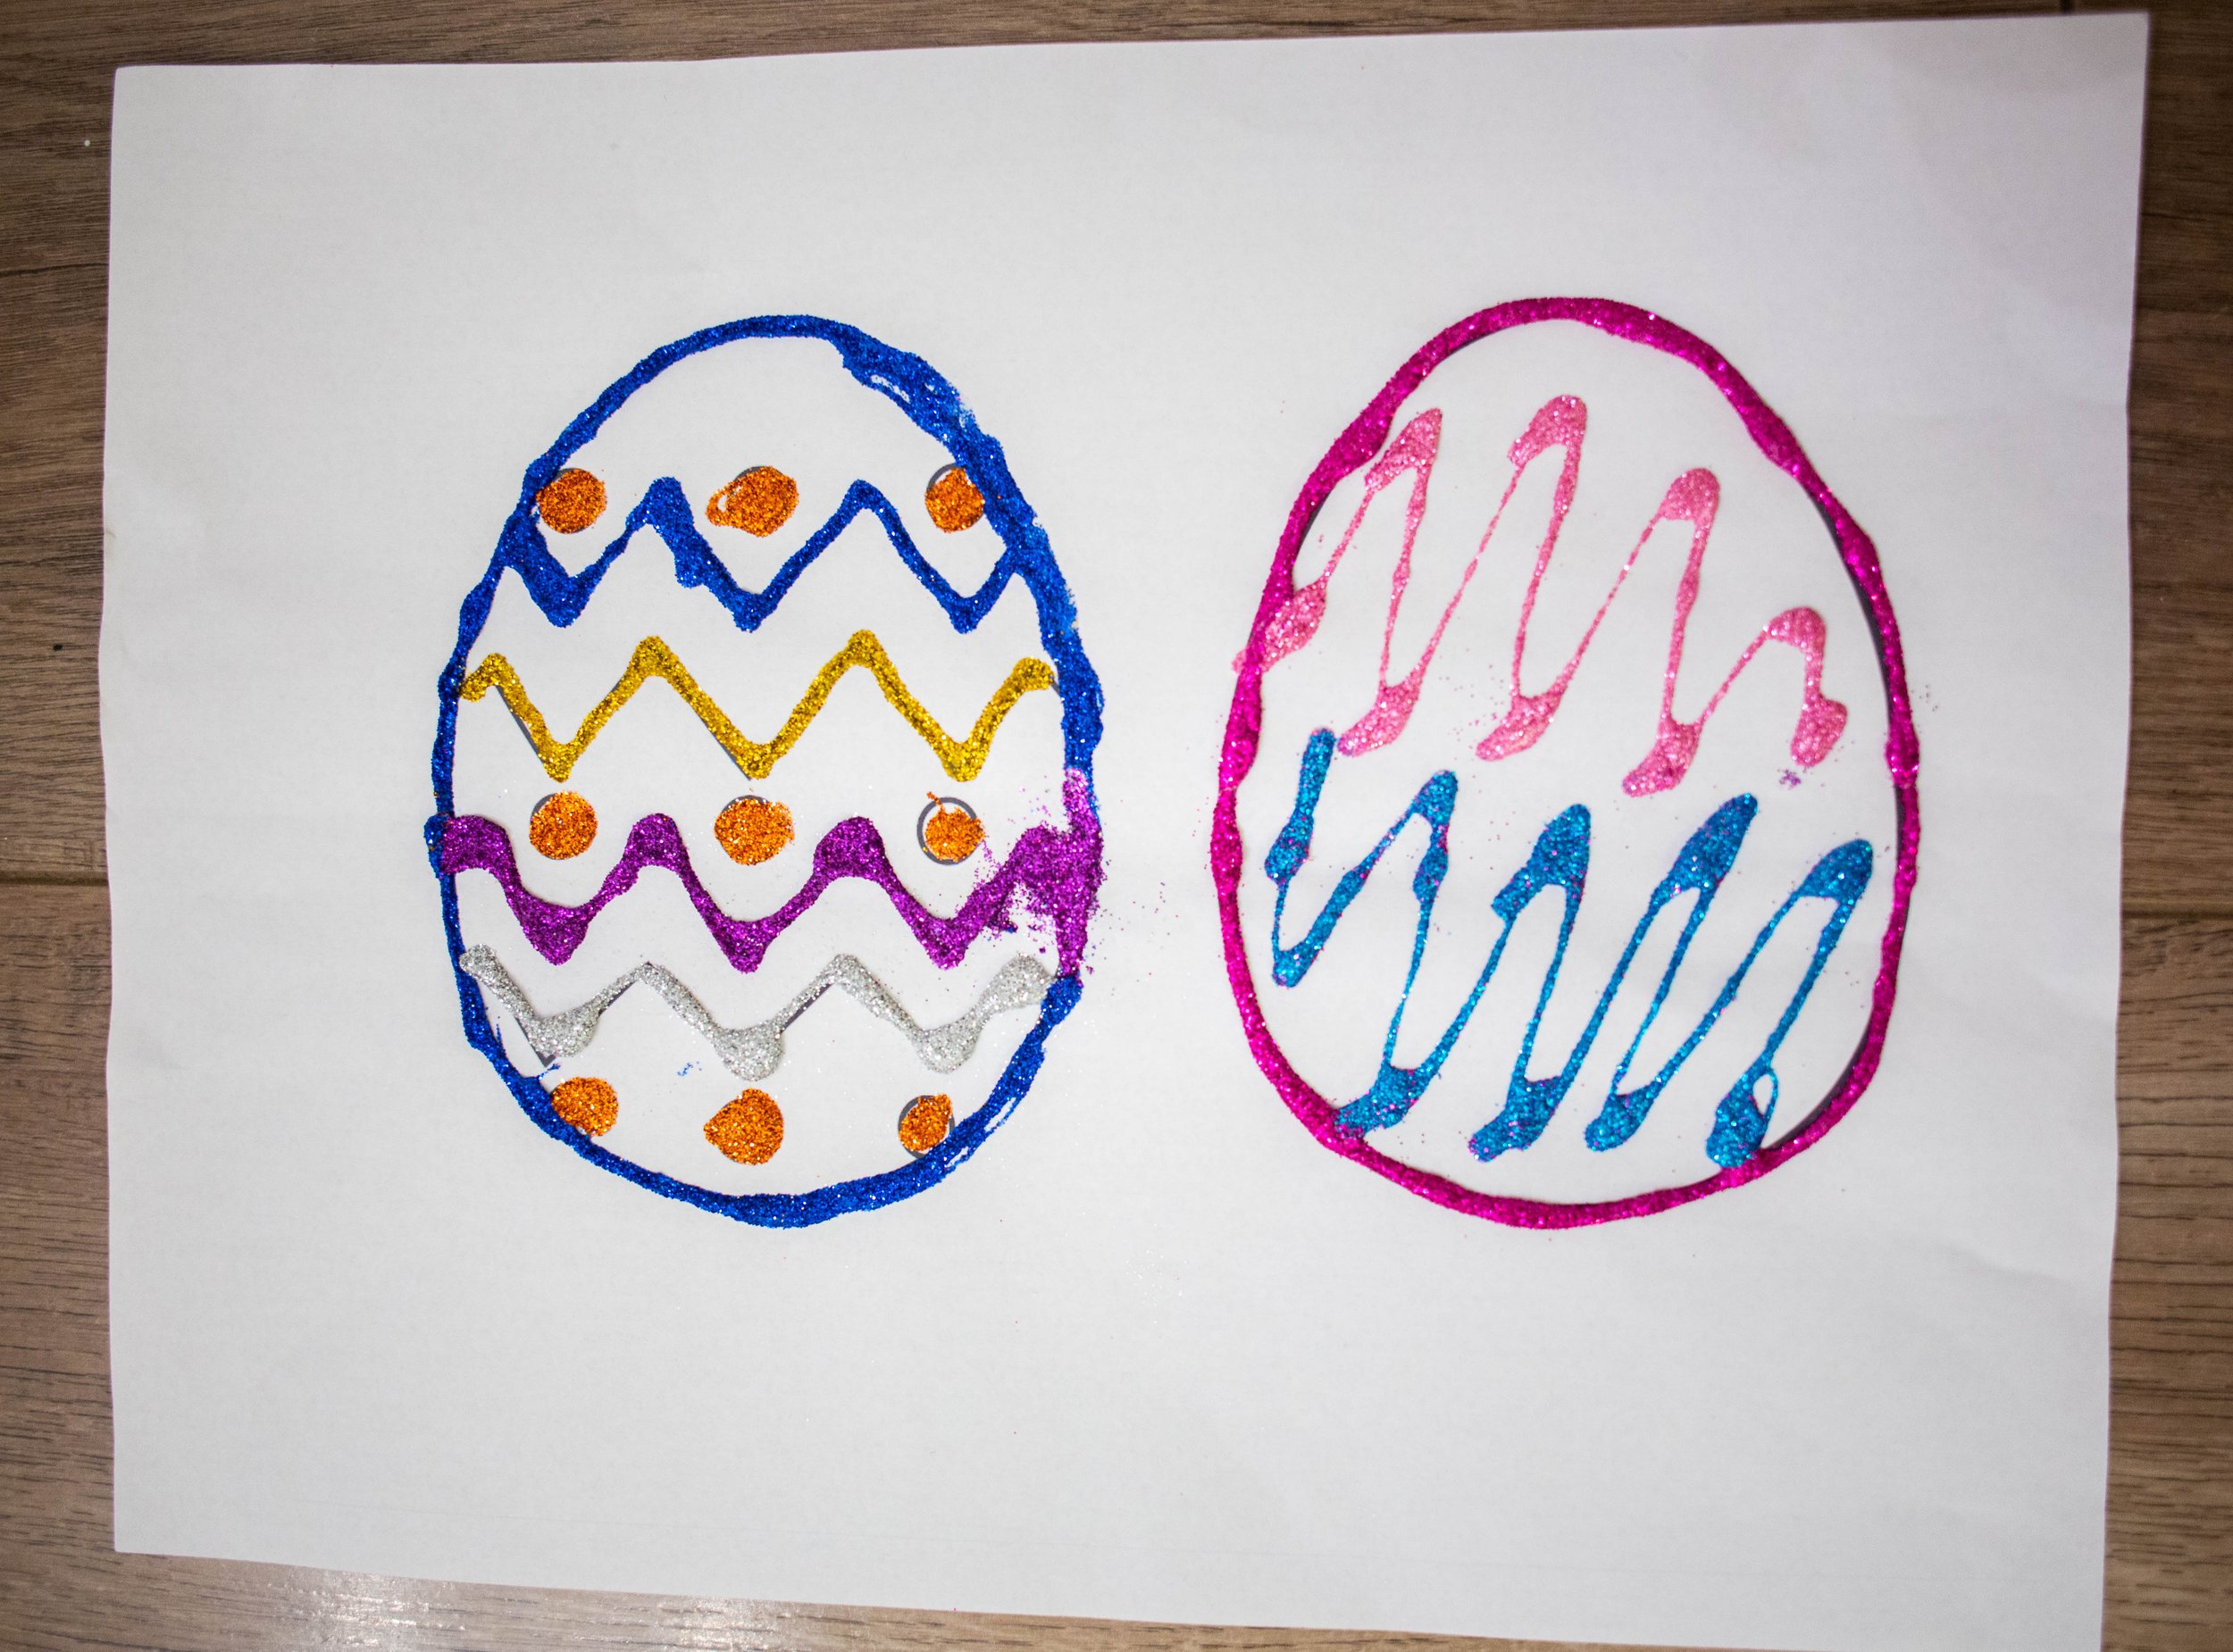
Have your child take Elmer's glue and trace the outline of the egg. (They may choose to follow the design on one and create their own design on the blank egg.)
Place the paper on a cookie sheet and pour the desired glitter over the glue. I did a variety of colors on each of them.
Shake off excess glitter back into the glitter container or onto the cookie sheet.
Let dry.
Free Download
Here is the free printable download!
Food Coloring Easter eggs
Don't have fancy Easter egg wraps or dyes? No worries! There's always the classic food coloring method! That's how we did it as kids, right?! With the white crayons to draw surprise pictures on the eggs? Well, they're still a thing in my house.
You will need:
Food coloring
Cups
Boiling water
Vinegar
Hard-boiled eggs
Instructions:
Pour about 1/2 cup of boiling water to each cup.
Add in 1 tsp vinegar to each cup of water.
Next, add about 10-20 drops of desired food color to a cup. Repeat with other colors. *Note: mix colors to achieve additional colors.
Dip the eggs in the food coloring dye for about 5 minutes.
Remove the eggs from the cups with a slotted spoon, tongs, etc.
Let dry on a paper towel.
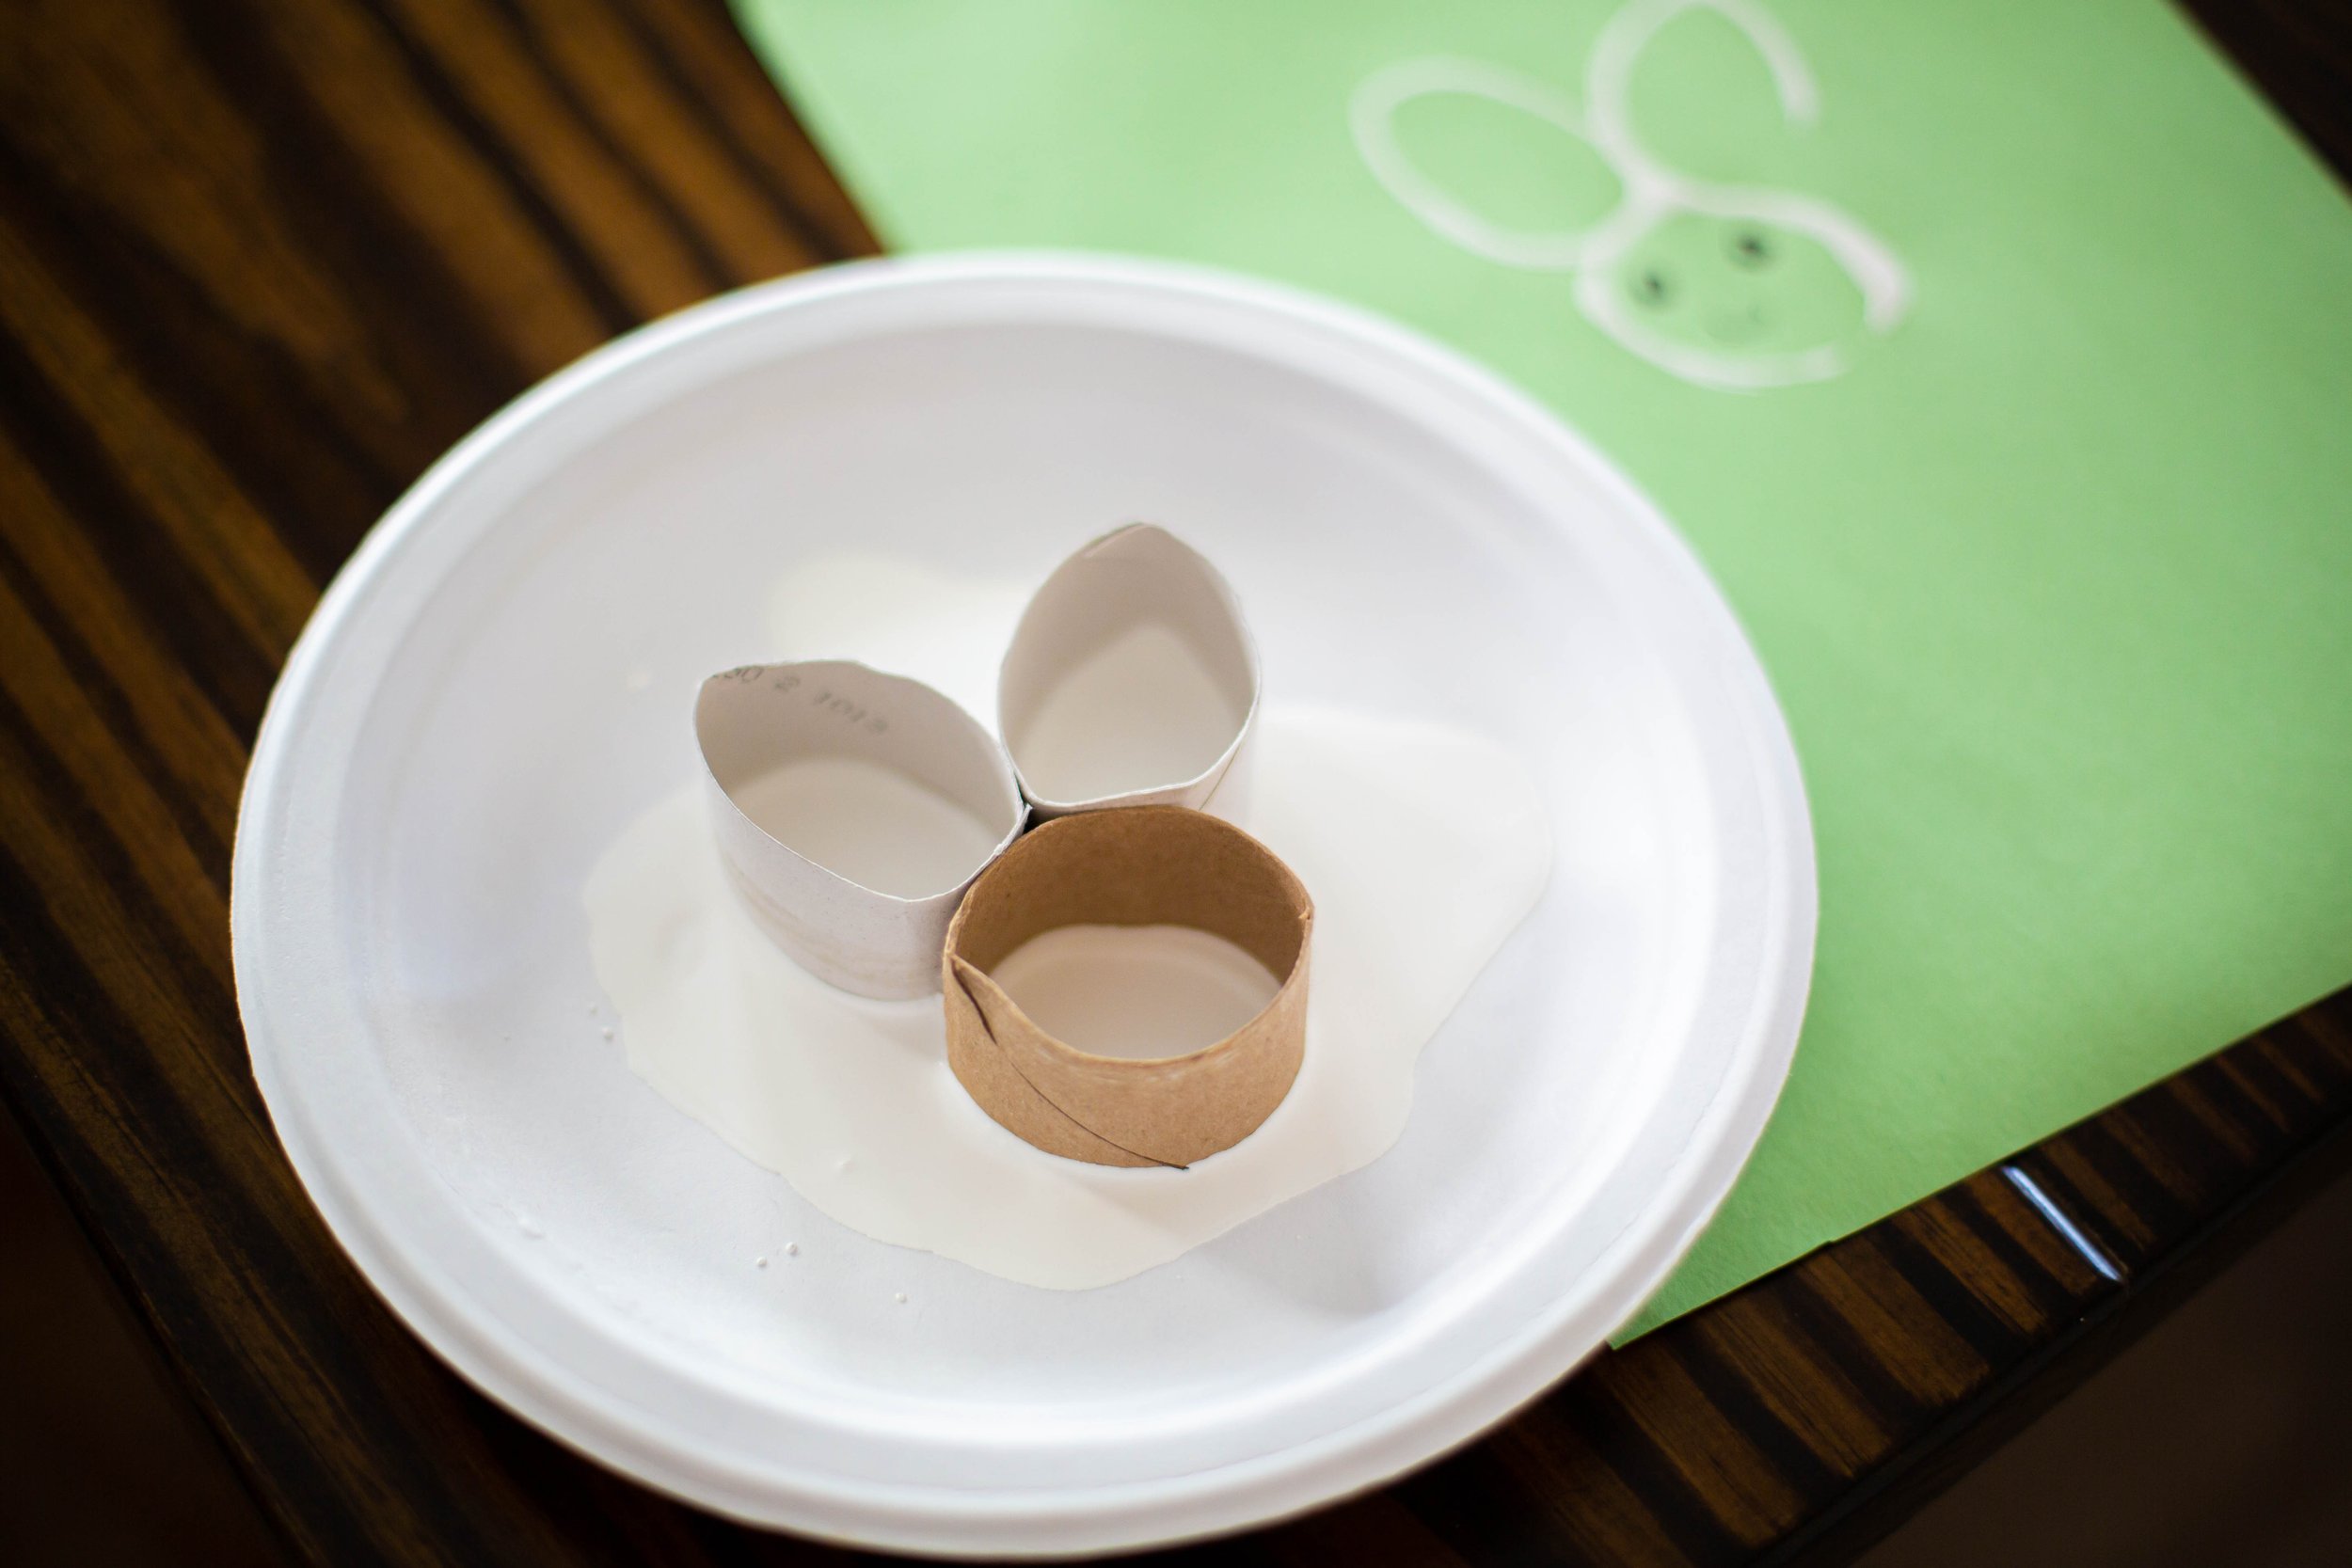
DIY bunny stamps
Apparently, we save a lot of TP rolls around here. But it makes for a variety of easy crafts! Here's a quick one that turned out really cute.
You will need:
3 toilet paper rolls
Paint
Paper plate
Colored or white paper
Hot glue
Instructions:
Bend and shape two of the toilet paper rolls into oval shapes--creating "ears" for the bunny.
Next, hot glue the ears to the remaining toilet paper roll to create an outline of a rabbit head.
While the bunny stamp cools, dispense desired paint on a paper plate.
Once the glue is dried/cooled, dip your bunny stamp in the paint then press it onto a sheet of paper.
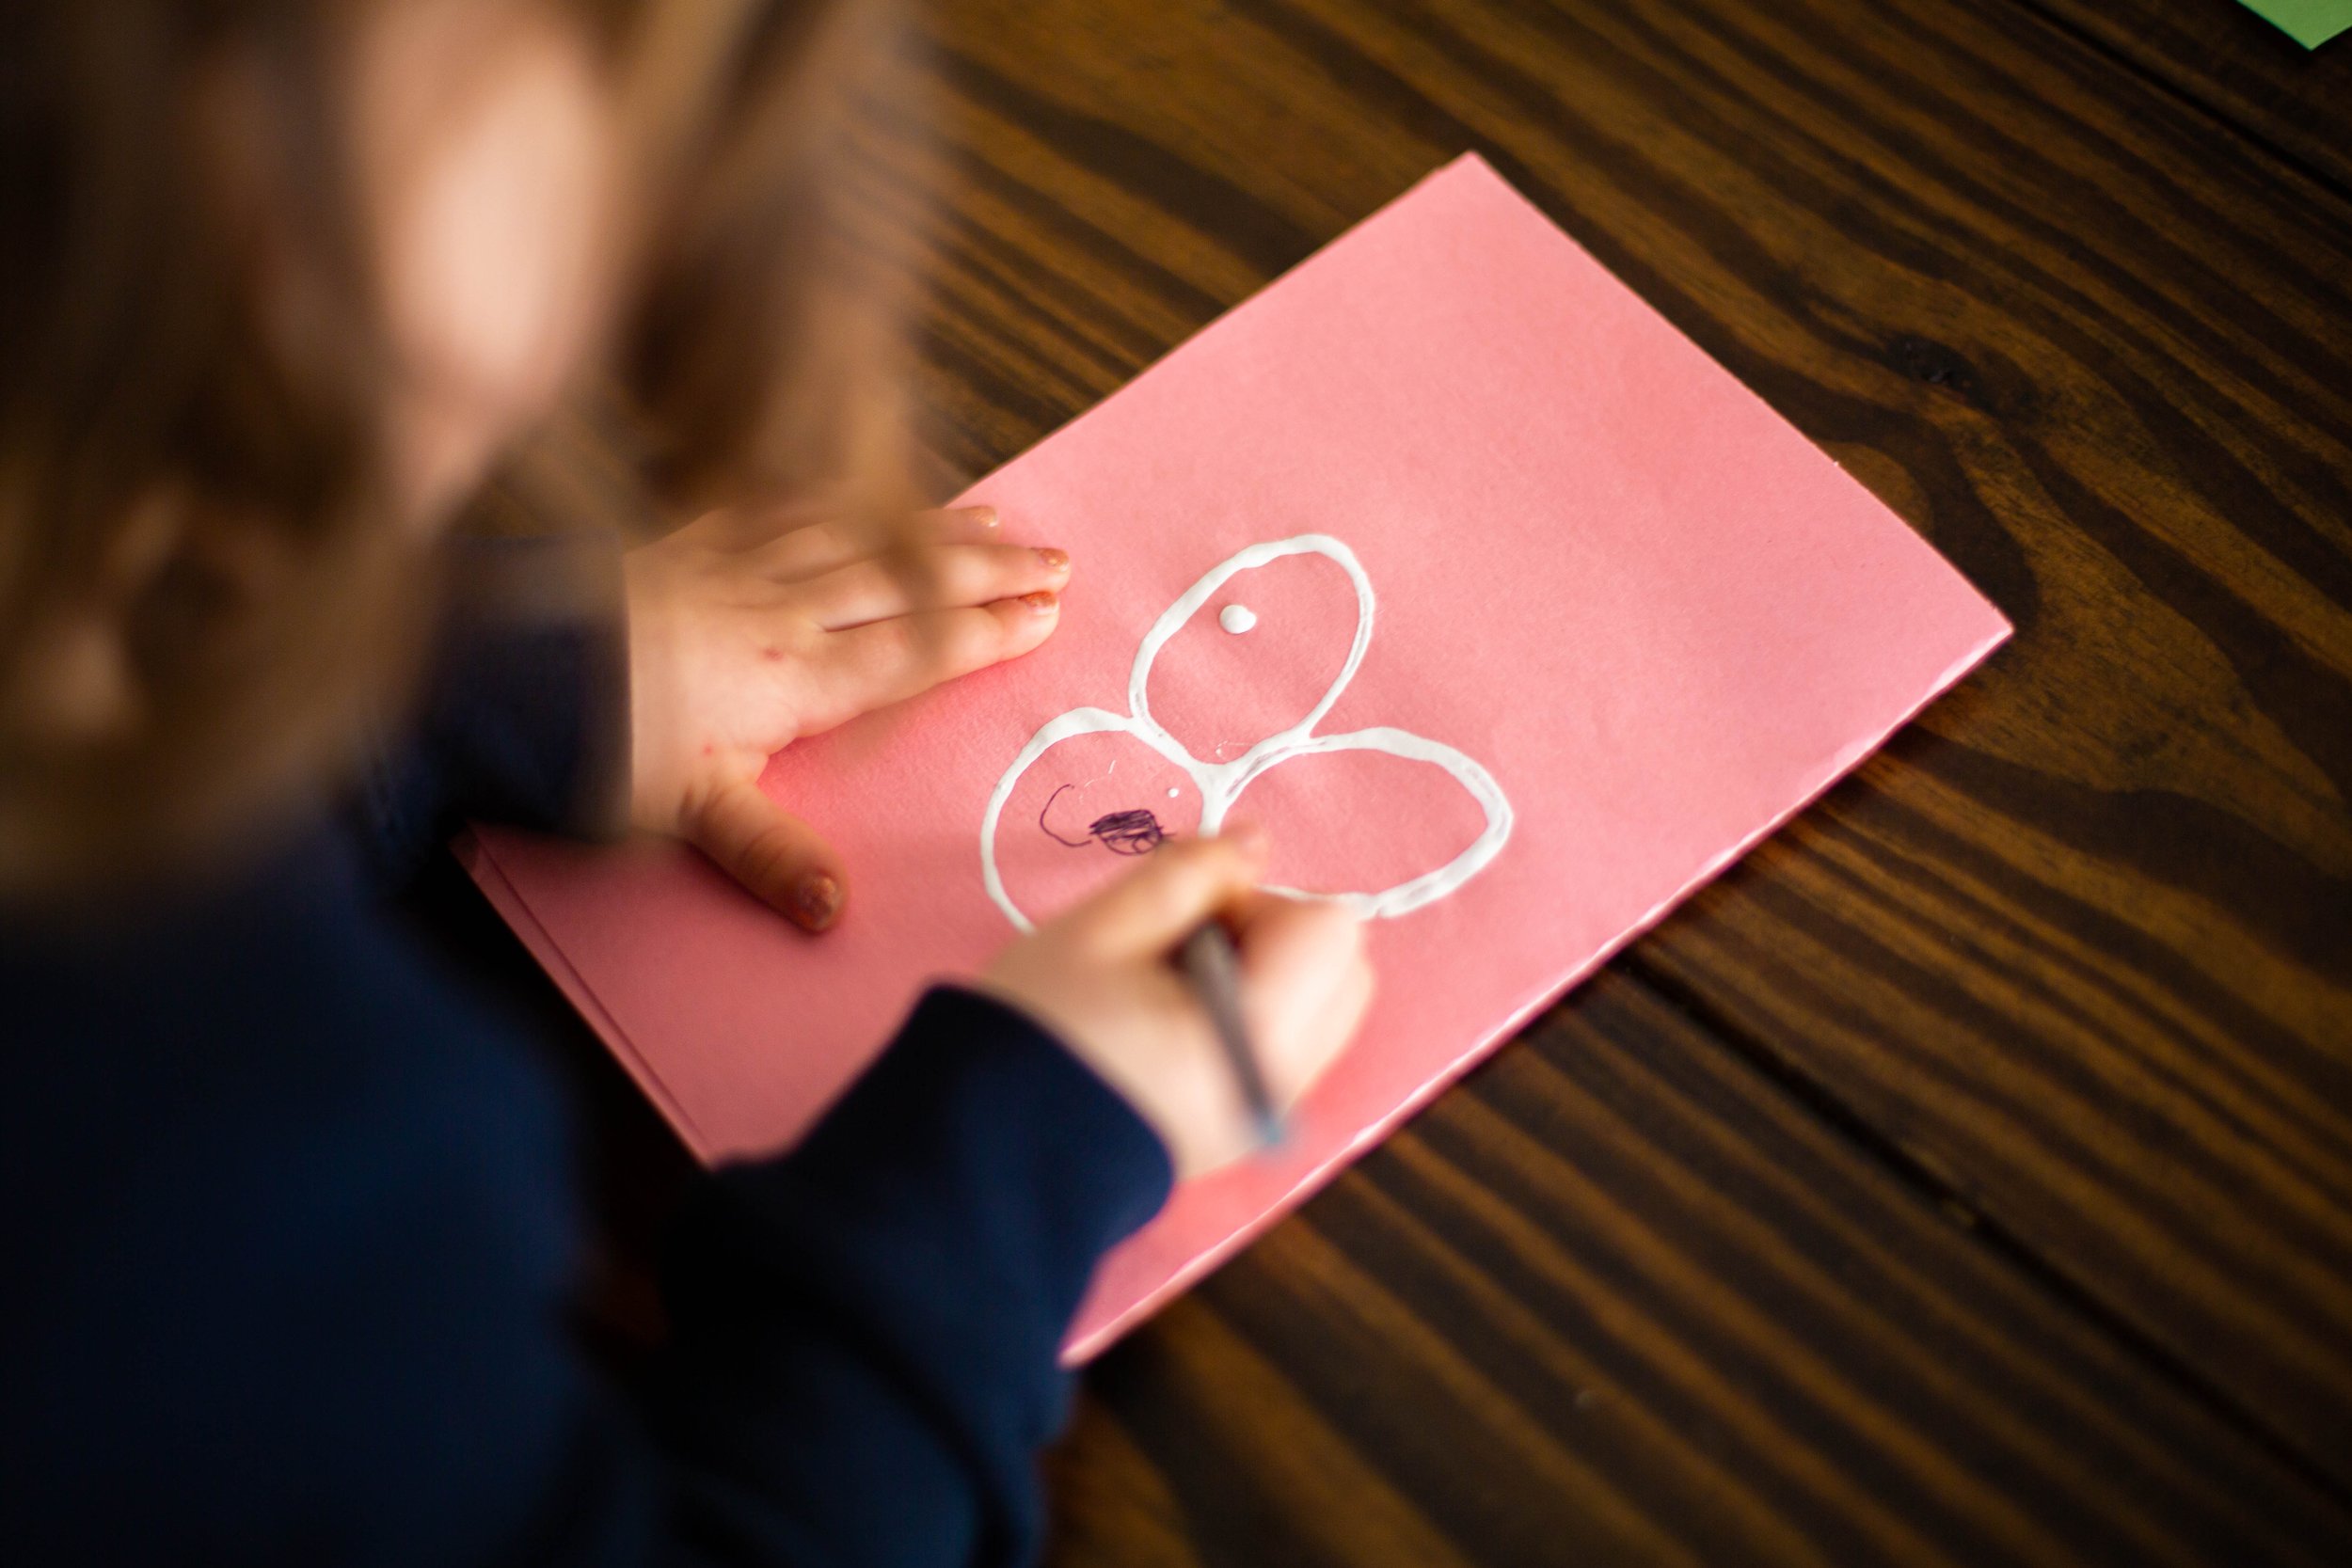

Activity Notes:
We liked doing white paint on (Easter) colored paper. My girls also liked drawing faces on their bunnies and making them into Easter cards for their friends. I also ended up cutting my toilet paper rolls a bit shorter, which made them a bit uneven when stamping the paint on the paper. We just made sure to press each side down so that the outline turned out crisp!
Printable Easter Memory Game
We love the game memory in our house, so any variation of it is a win for us! I made this little festive one that includes a variety of colored eggs, ducks, chicks, bunnies, and lambs. Perfect for spring. Just download the file below and print it!
Free Download
Here is the free printable download!

Pin it for later!


Our free Halloween Seek and Find download is a fun way to work on visual discrimination and fine motor skills for Halloween!