
Tie Dye Christmas Ornaments
We have a super easy and beautiful Christmas craft for you today. With just a few supplies, you can make the most colorful tie dye Christmas ornaments that you can enjoy on your tree for years to come. These are inspired by Miss Morgan’s beautiful ornaments that she posted here. Keep reading for all the details on how we did our version!

You will need:
Color bleeding tissue paper (this kind! It has to be the kind that bleeds!)
Water bottle
Acrylic spray (like this)
Optional: Permanent marker
The Preschool Place is a participant in the Amazon Services LLC Associates Program, an affiliate advertising program. As an Amazon Associate, we earn from qualifying purchases.

Instructions:
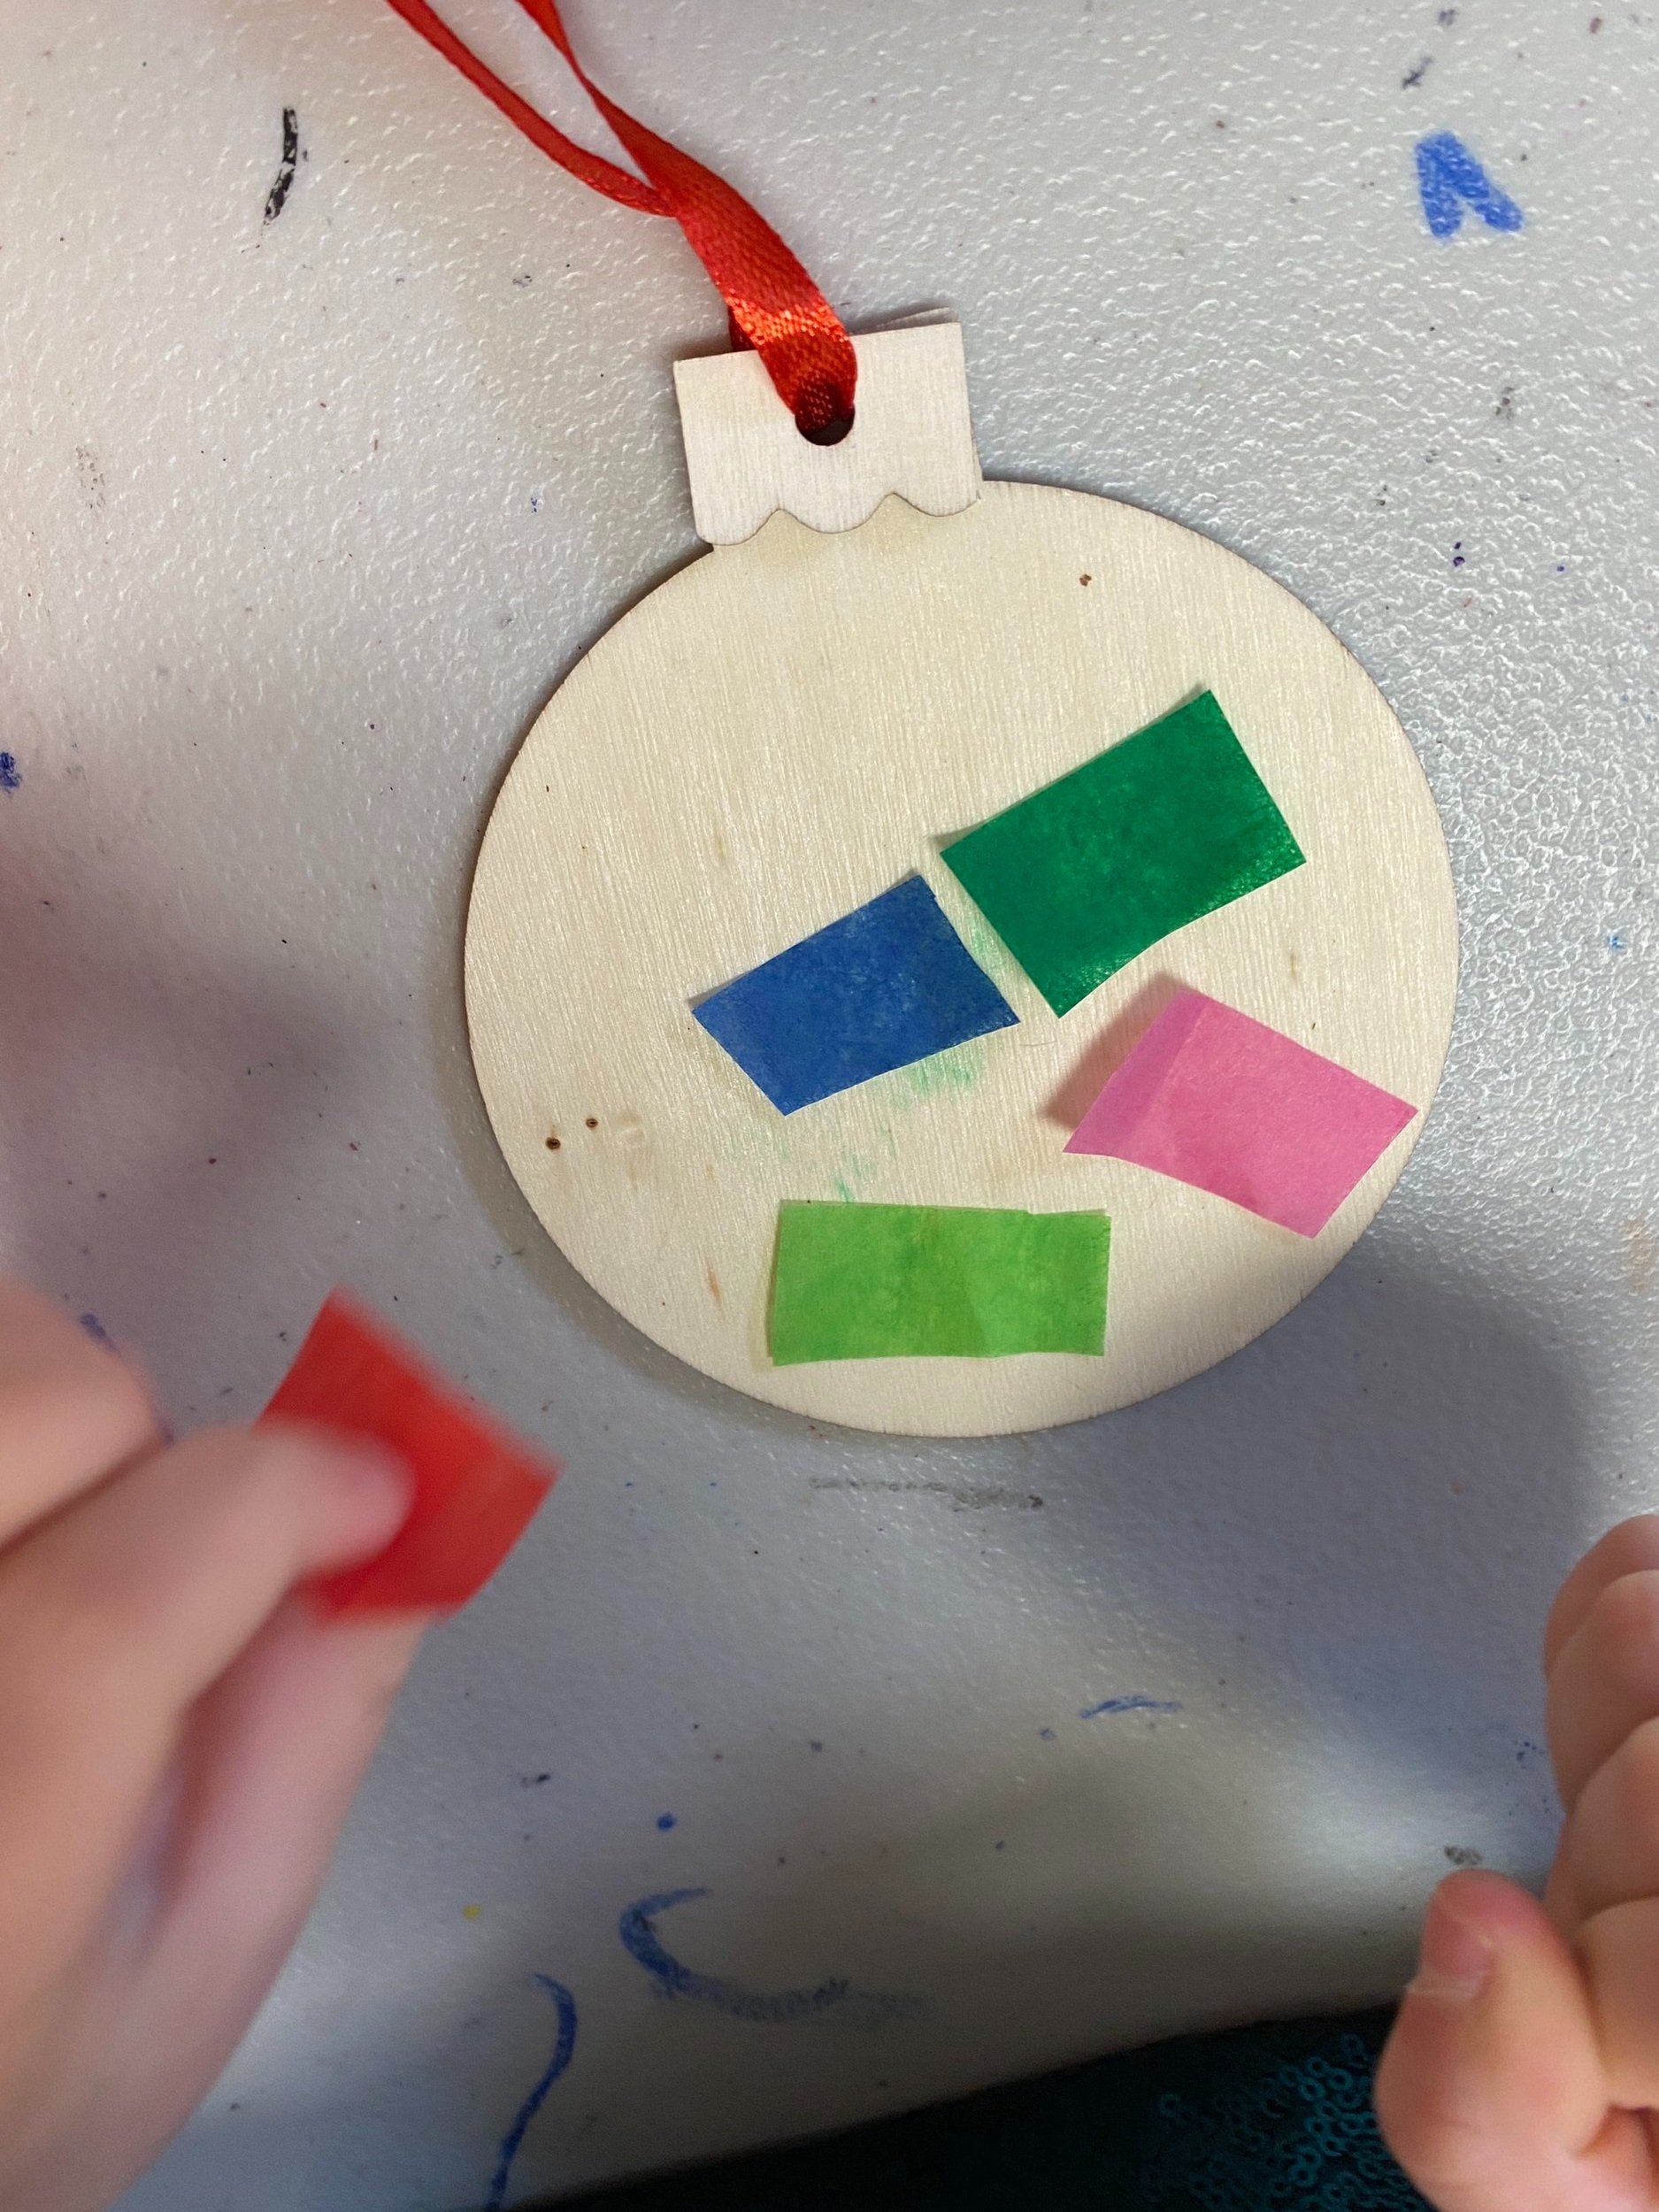
Cut your tissue paper into small squares.
Mist the ornament with the spray bottle to help the tissue paper stick.
Have your child place the tissue paper onto their ornament. We found that lightly misting the paper while you are working helps it stick better.
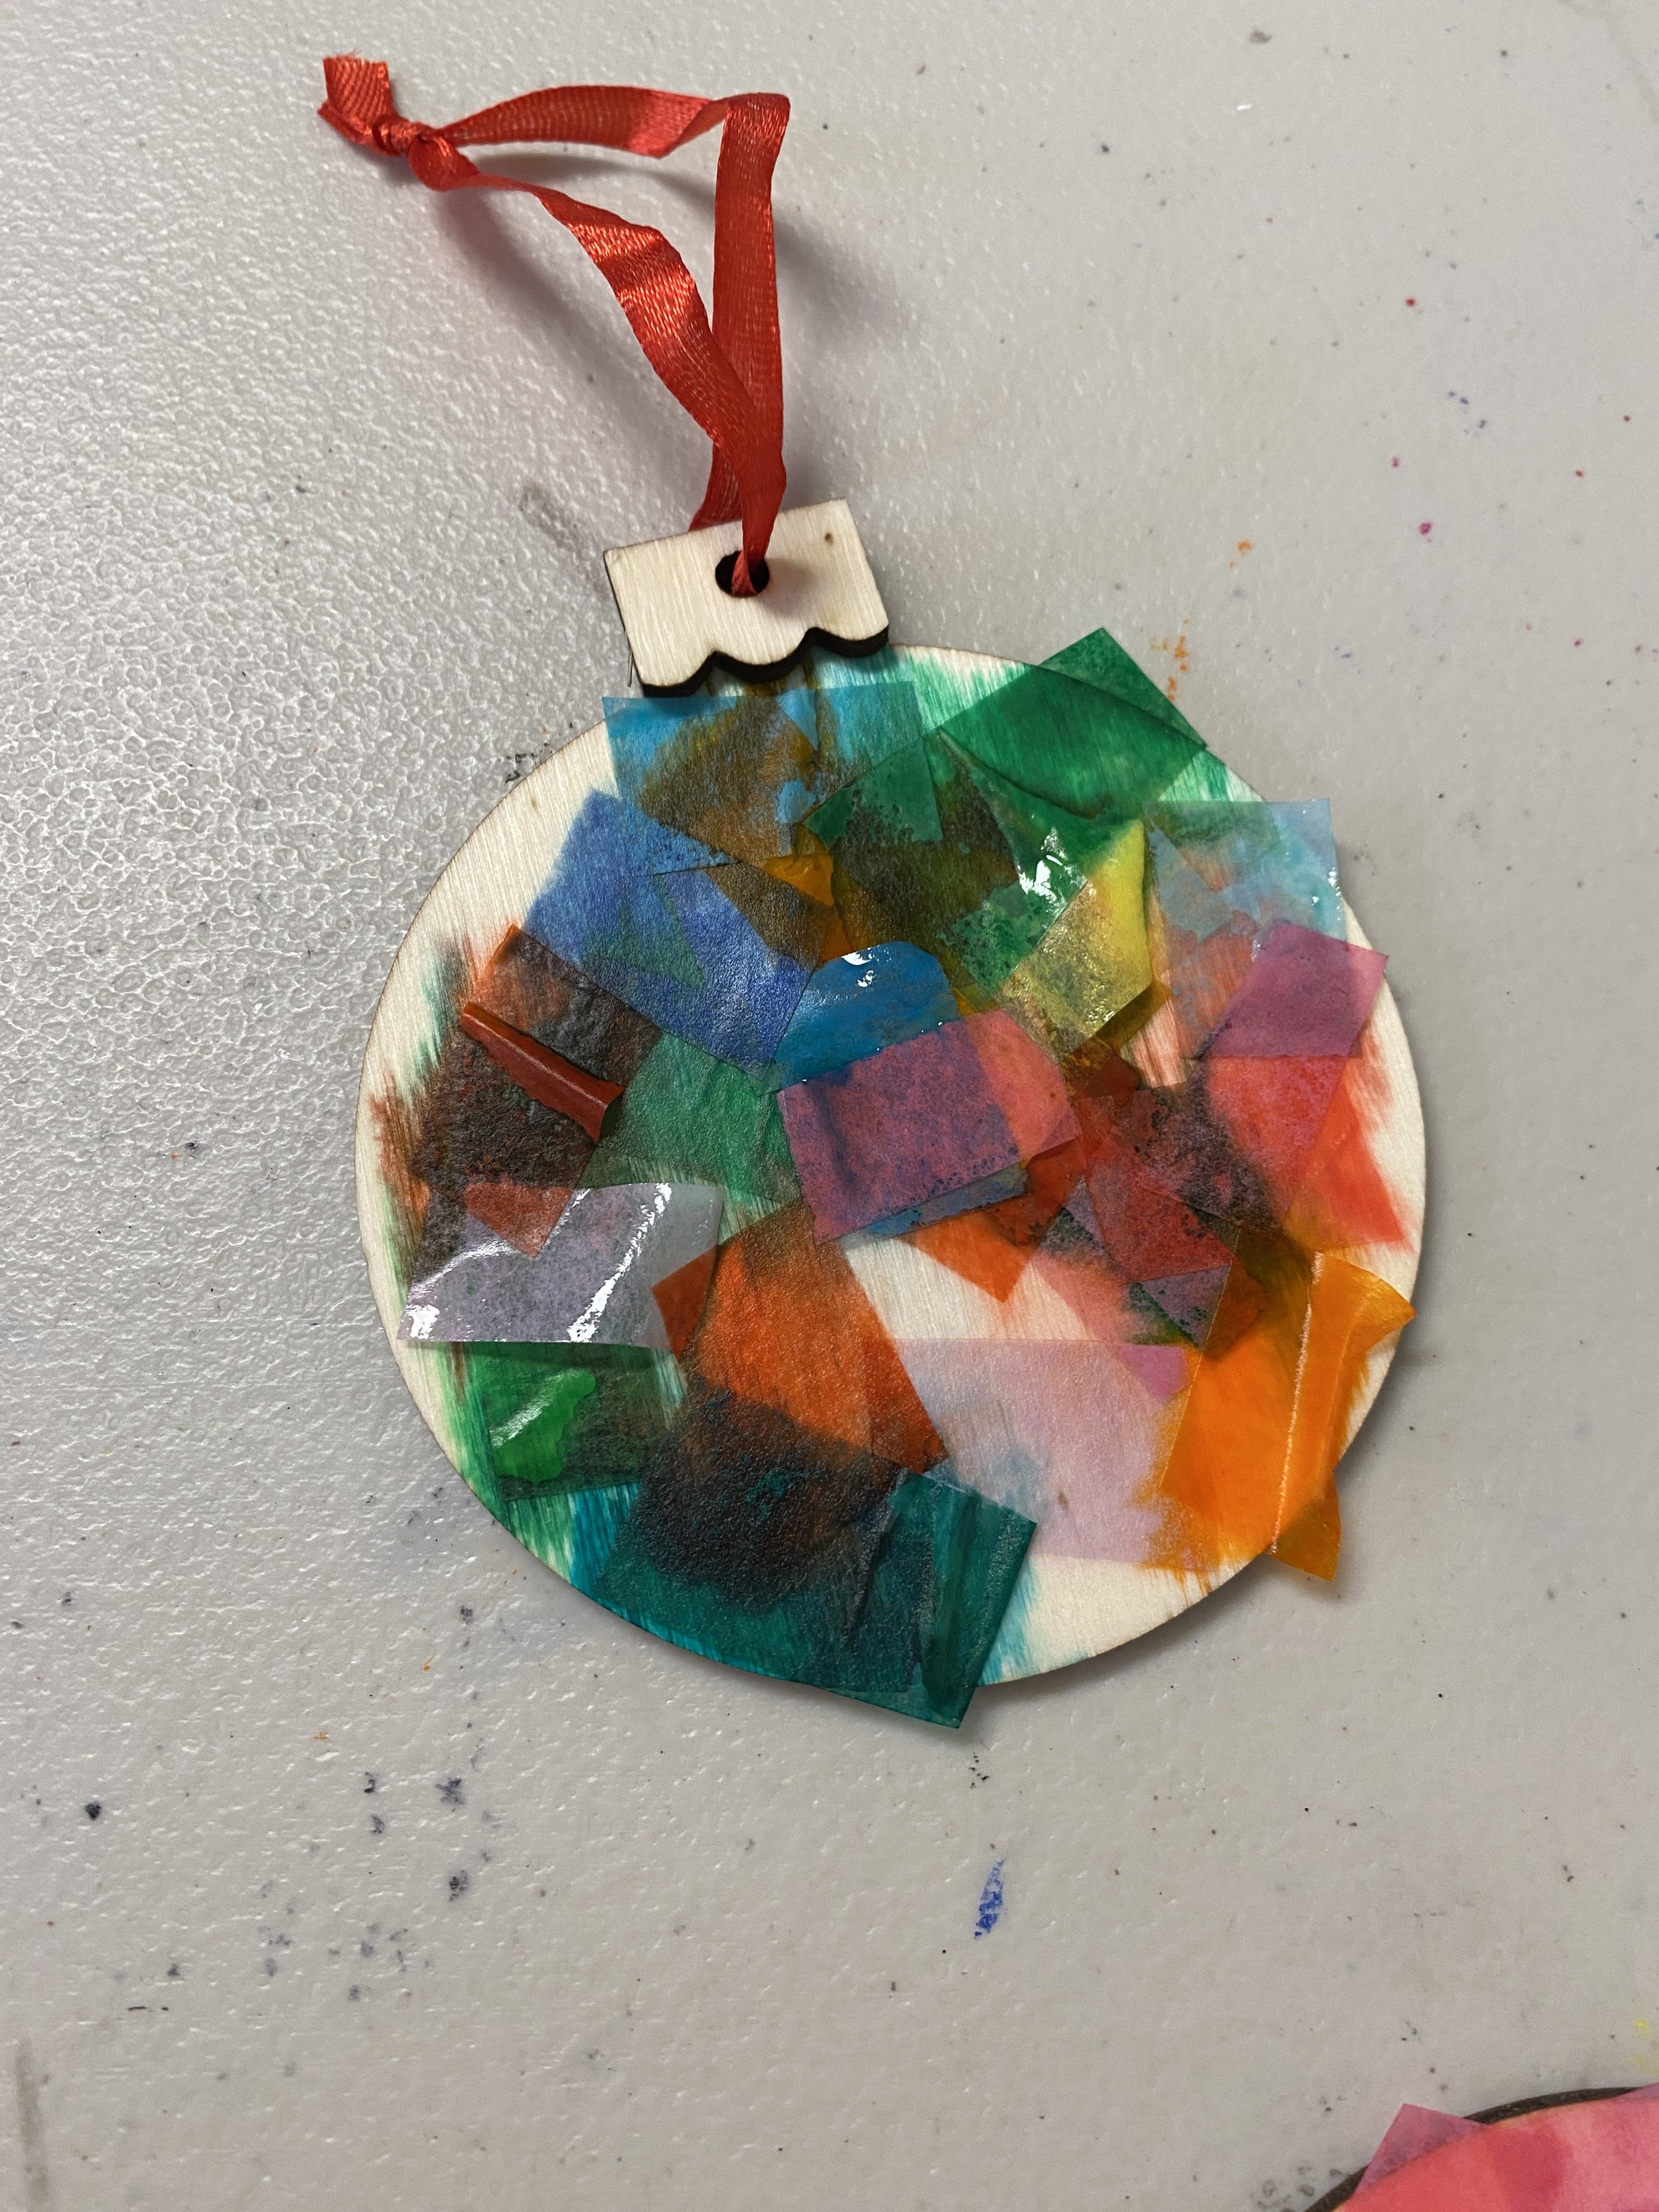
Make sure all of the tissue paper is thoroughly wet.
Let the ornament dry. Ours only took about an hour.
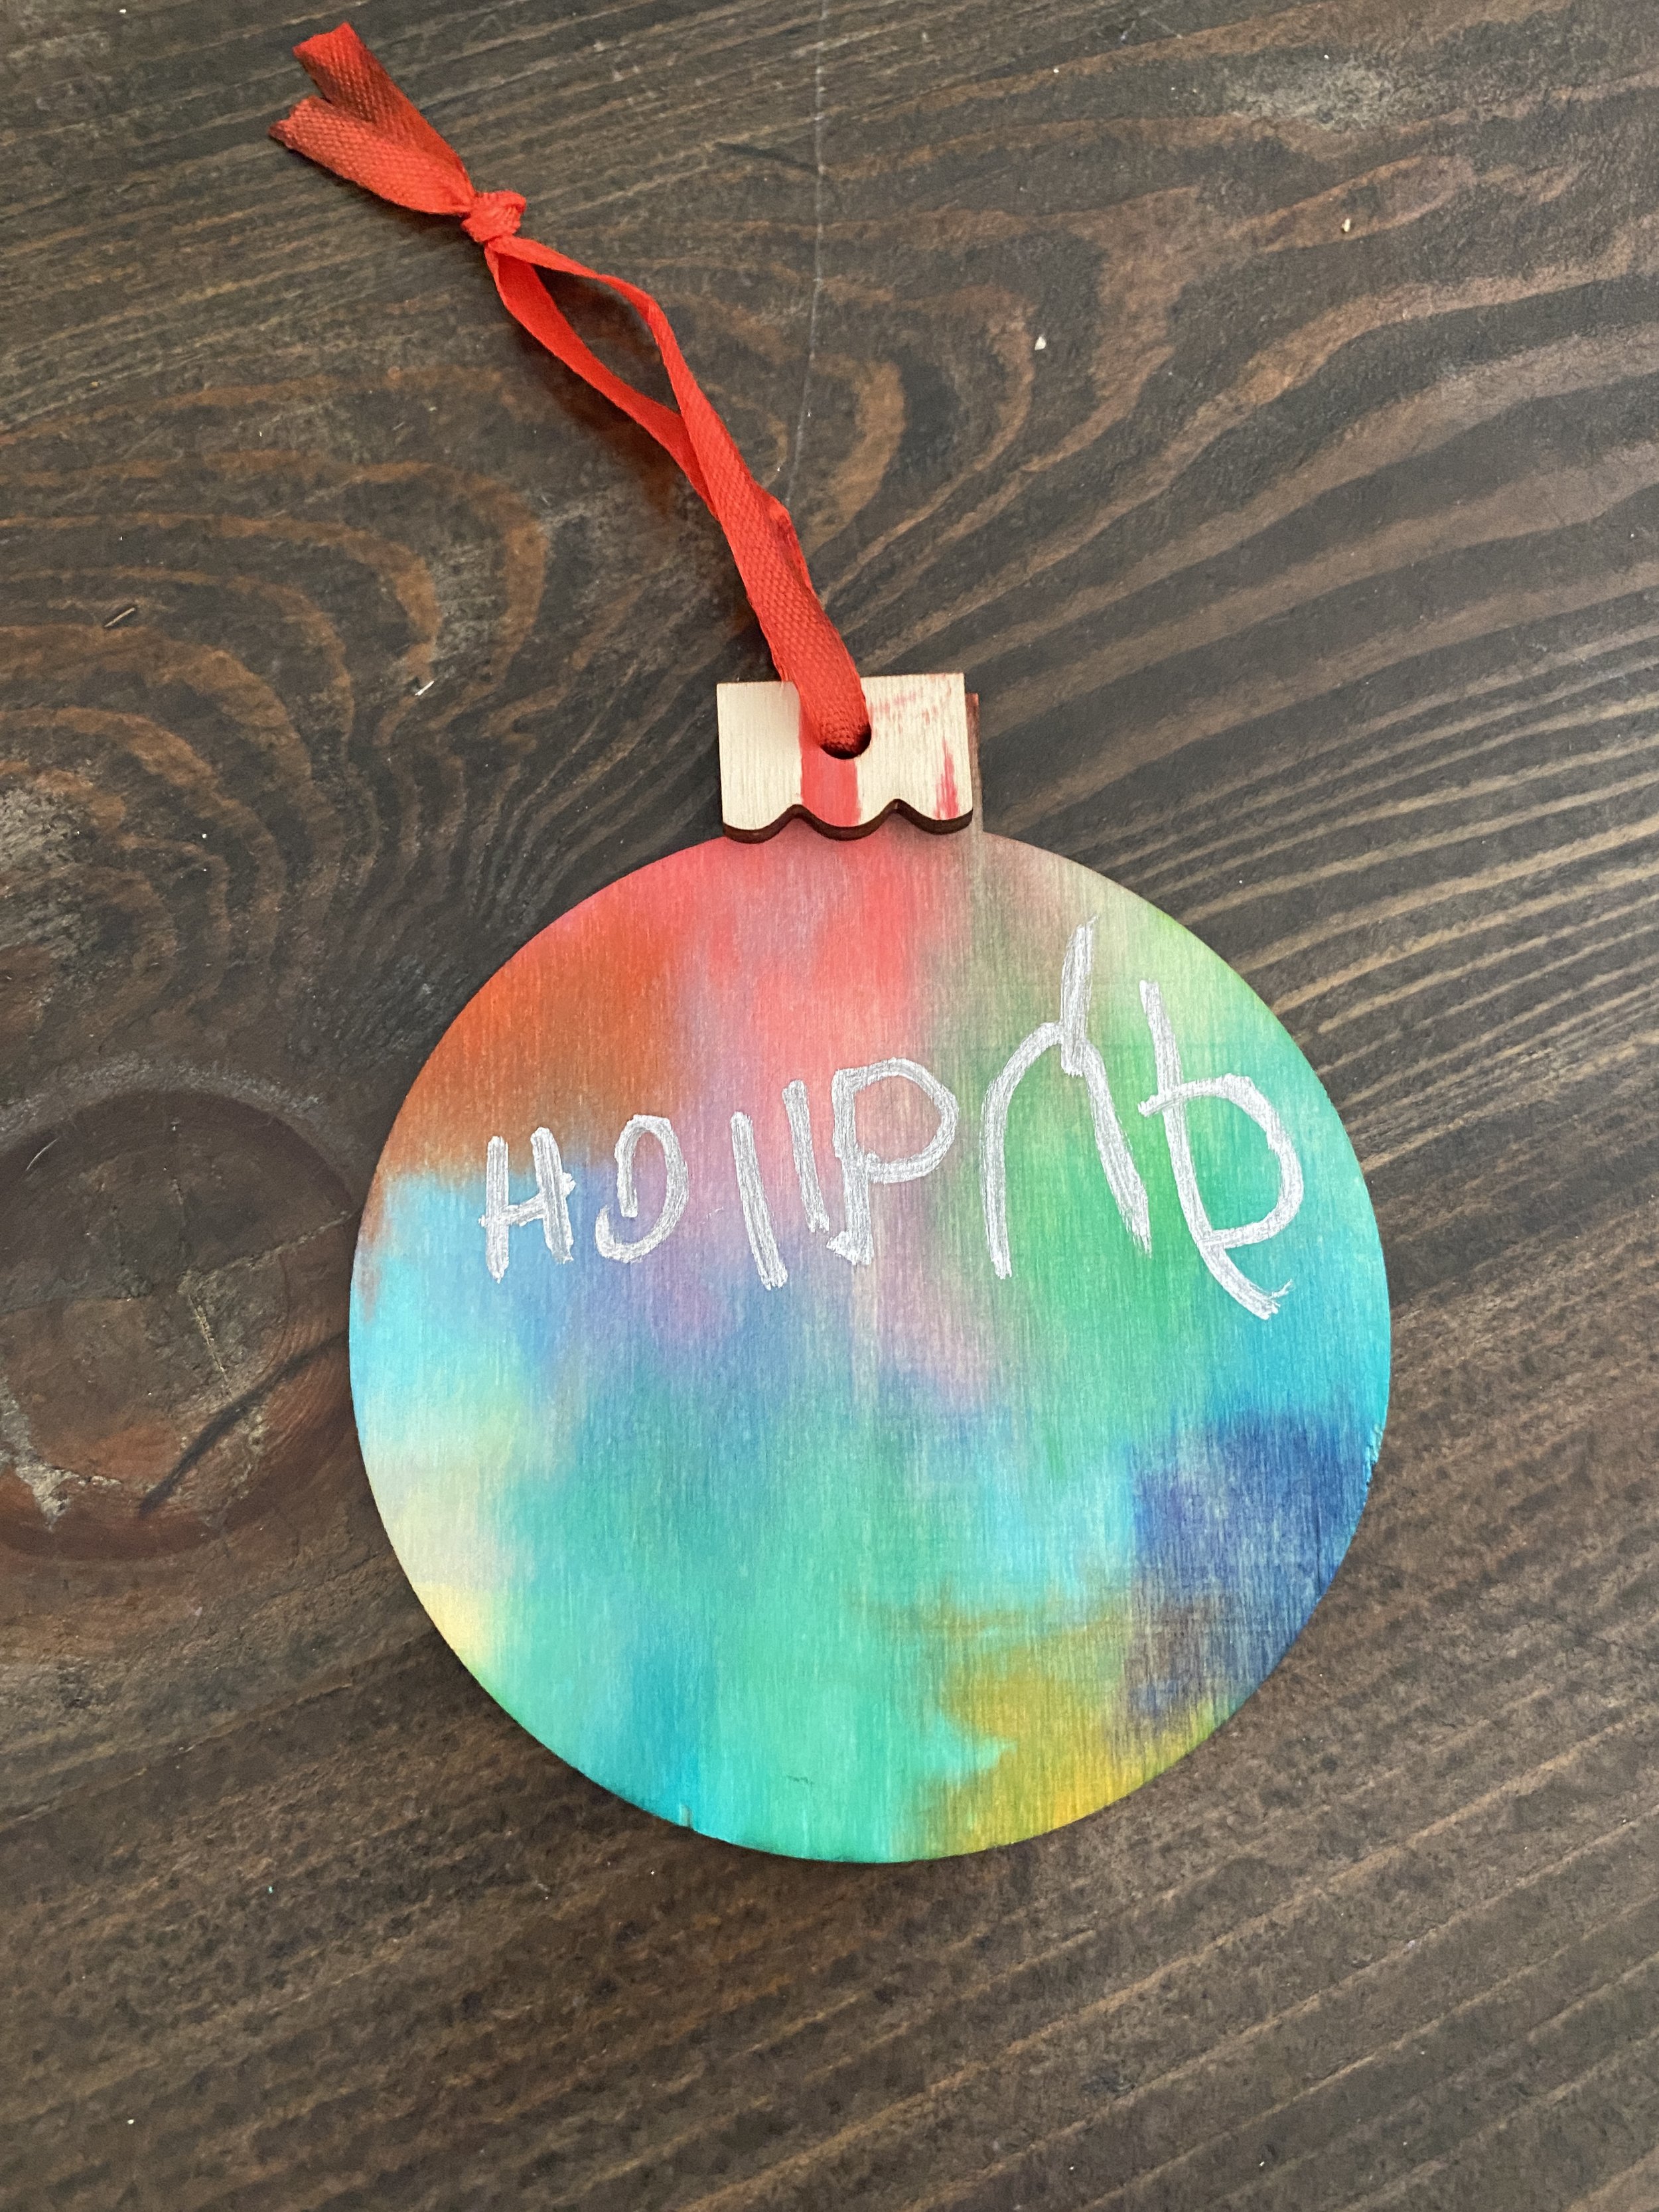
When the paper is dry, remove it from the ornament and discard it.
Optional: Decorate with permanent marker. We used a metallic marker and it turned out so fun!
Seal the ornament with the acrylic spray and let dry.

We hope you love this simple ornament idea! Merry Christmas!
Pin it for later!


Our Shape Worksheets are perfect for helping preschoolers learn all about their shapes! Three different worksheets for 6 different shapes!